
Sangwon Coding
3. 스프링과 Oracle Database 연동 본문
안녕하세요! 오랜만에 스프링 포스팅입니다. 알고리즘이랑 같이 공부하느라 포스팅할 시간이 없었네요 ㅜㅜ
먼저 오라클을 설치해보겠습니다!
Oracle | Integrated Cloud Applications and Platform Services
Oracle named a leader in The Forrester Wave™: Translytical Data Platforms, Q4 2019 Oracle scores highest in the current offering and strategy categories. Forrester notes that customers like Oracle databases’ capability to support many workloads including O
www.oracle.com
오라클 공식홈페이지에서 다운로드 가능하고 여기서 database 항목에서 11g Express 버전을 다운받아주시면 됩니다!
설치를 다 하였다는 가정하에 홈페이지에서 SQL Developer도 같이 설치해줍니다!

설치파일을 실행시켜서 SQL Developer가 켜지면 아래와 같이 접속 설정을 해줍니다. (오라클 환경 설정은 포스팅에서 따로 다루지 않습니다!)

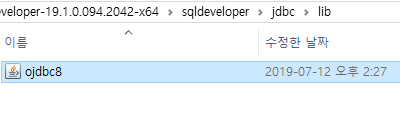
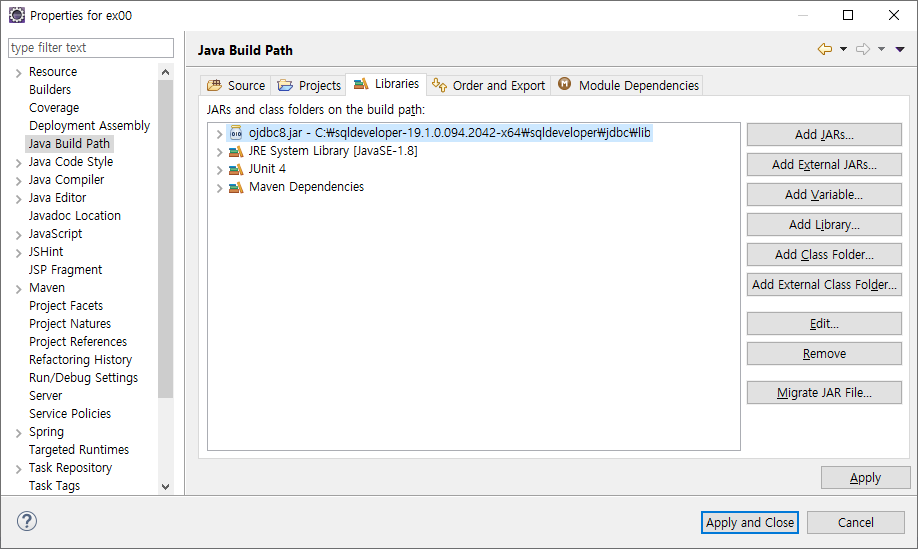
이제 프로젝트에 JDBC를 연결해볼텐데 프로젝트 속성에서 'Build Path'를 이용해 SQL Developer를 다운하면서 다운된 경로에 odjbc8.jar 파일을 등록시켜줘야합니다.
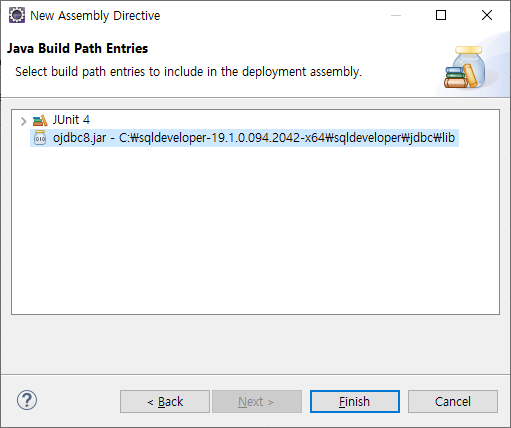
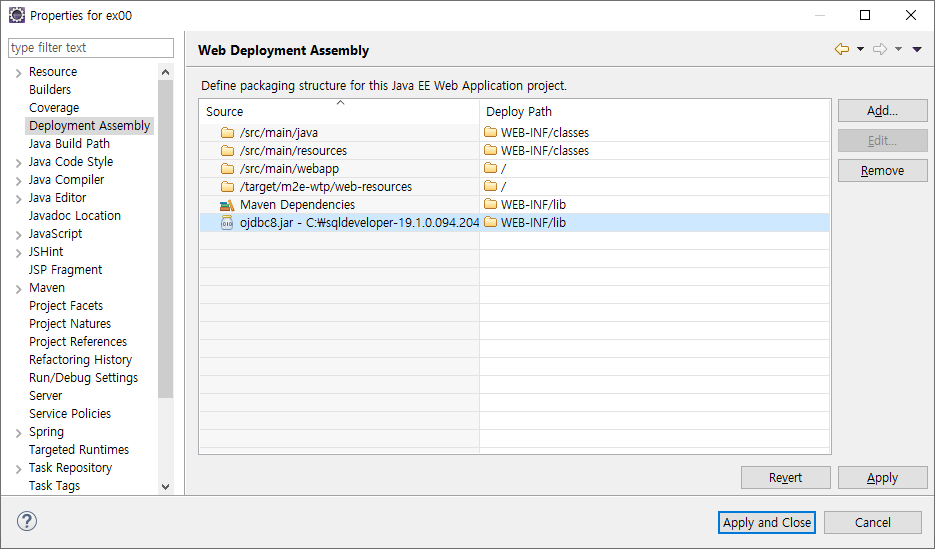
'Web Deployment Assembly' 항목에서도 Add 버튼을 통해 'Java Build Path'를 선택합니다.

이제 테스트 코드를 통해 테스트를 해볼텐데 'src/test/java'에 'org.zerock.persistence' 패키지를 만들고 그 안에 JDBCTests 클래스를 추가합니다. 소스 코드는 다음과 같습니다.
package org.zerock.persistence;

import static org.junit.Assert.fail;

import java.sql.Connection;
import java.sql.DriverManager;

import org.junit.Test;

import lombok.extern.log4j.Log4j;

@Log4j
public class JDBCTests {
	static {
		try {
			Class.forName("oracle.jdbc.driver.OracleDriver");
		} catch (Exception e) {
			e.printStackTrace();
		}
	}

	@Test
	public void testConnection() {
		try (Connection con = DriverManager.getConnection("jdbc:oracle:thin:@localhost:1521:XE", "book_ex",
				"book_ex")) {
			log.info(con);
		} catch (Exception e) {
			fail(e.getMessage());
		}

	}
}
정상적인 실행결과는 다음과 같습니다!

이번엔 데이터베이스 연결을 이용하기 위한 커넥션 풀을 설정해보도록하겠습니다. 학습 교재에서는 최근 유행하는 HikariCP를 이용합니다.
먼저 pom.xml을 다음과 같이 수정해서 HikariCP를 추가합니다.
<!-- https://mvnrepository.com/artifact/com.zaxxer/HikariCP -->
		<dependency>
			<groupId>com.zaxxer</groupId>
			<artifactId>HikariCP</artifactId>
			<version>2.7.4</version>
		</dependency>
root-context.xml 안에 설정은 직접 <bean> 태그를 정의해서 작성합니다. <bean> 태그 내에는 <property>를 이용해서 여러 속성에 대해서 설정할 수 있는데 HikariCP에 대한 자세한 설정은 아래 주소에서 참고해서 작성합니다. 예제는 최소한의 설정만을 이용해서 아래의 소스코드 같이 작성하도록 합니다.
https://github.com/brettwooldridge/HikariCP#configura-tion-knobs-baby
brettwooldridge/HikariCP
光 HikariCP・A solid, high-performance, JDBC connection pool at last. - brettwooldridge/HikariCP
github.com
<?xml version="1.0" encoding="UTF-8"?>
<beans xmlns="http://www.springframework.org/schema/beans"
	xmlns:xsi="http://www.w3.org/2001/XMLSchema-instance"
	xmlns:context="http://www.springframework.org/schema/context"
	xmlns:mybatis-spring="http://mybatis.org/schema/mybatis-spring"
	xsi:schemaLocation="http://mybatis.org/schema/mybatis-spring http://mybatis.org/schema/mybatis-spring-1.2.xsd
		http://www.springframework.org/schema/beans https://www.springframework.org/schema/beans/spring-beans.xsd
		http://www.springframework.org/schema/context http://www.springframework.org/schema/context/spring-context-4.3.xsd">

	<!-- Root Context: defines shared resources visible to all other web components -->
	<bean id="hikariConfig" class="com.zaxxer.hikari.HikariConfig">

		<!-- <property name="driverClassName" value="oracle.jdbc.driver.OracleDriver"></property>
			<property name="jdbcUrl" value="jdbc:oracle:thin:@localhost:1521:XE"></property> -->

		<property name="driverClassName"
			value="net.sf.log4jdbc.sql.jdbcapi.DriverSpy"></property>
		<property name="jdbcUrl"
			value="jdbc:log4jdbc:oracle:thin:@localhost:1521:XE"></property>


		<property name="username" value="book_ex"></property>
		<property name="password" value="book_ex"></property>
	</bean>

	<!--HikariCP Configuration -->
	<bean id="dataSource" class="com.zaxxer.hikari.HikariDataSource"
		destroy-method="close">
		<constructor-arg ref="hikariConfig" />
	</bean>

	<context:component-scan
		base-package="org.zerock.sample"></context:component-scan>

</beans>
이번엔 'src/test/java'내 'org.zercok.persistence'패키지 내에 DataSourceTests 클래스를 작성합니다.
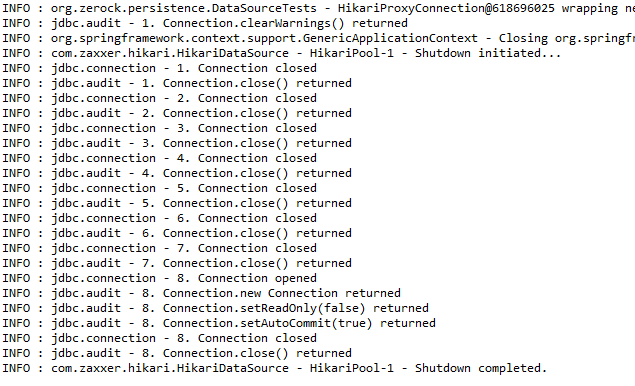
이 테스트 코드는 스프링에 빈(Bean)으로 등록된 DataSource를 이용해서 Connection을 제대로 처리할 수 있는지를 확인해 보는 용도입니다. testConnection()을 실행해 보면 내부적으로 HikariCP가 시작되고, 종료되는 로그를 확인할 수 있습니다.
package org.zerock.persistence;

import static org.junit.Assert.fail;

import java.sql.Connection;

import javax.sql.DataSource;

import org.apache.ibatis.session.SqlSessionFactory;
import org.junit.Test;
import org.junit.runner.RunWith;
import org.springframework.beans.factory.annotation.Autowired;
import org.springframework.test.context.ContextConfiguration;
import org.springframework.test.context.junit4.SpringJUnit4ClassRunner;

import lombok.Setter;
import lombok.extern.log4j.Log4j;

@RunWith(SpringJUnit4ClassRunner.class)
//xml설정을 이용하는 경우
@ContextConfiguration("file:src/main/webapp/WEB-INF/spring/root-context.xml")
//JAVA설정을 사용하는 경우 @ContextConfiguration(classes= {RootConfig.class})
@Log4j
public class DataSourceTests {

    @Setter(onMethod_ = {@Autowired})
    private DataSource dataSource;

    @Test
    public void testConnection() {
        try (Connection con= dataSource.getConnection()){

            log.info(con);

        } catch (Exception e) {
            fail(e.getMessage());

        }
    }

}
이상으로 오라클 데이터베이스 연동 포스팅을 마치고 다음 포스팅은 MyBatis와 스프링 간 연동하는 방법으로 돌아오겠습니다!
'Spring > 코드로 배우는 스프링 웹 프로젝트' 카테고리의 다른 글
| 5. 스프링 MVC의 기본 구조 (0) | 2019.11.07 |
|---|---|
| 4. MyBatis와 스프링 연동 (0) | 2019.11.05 |
| 2. 스프링의 특징과 의존성 주입 (4) | 2019.11.02 |
| 1. 개발을 위한 준비 (2) (0) | 2019.11.02 |
| 1. 개발을 위한 준비 (1) (0) | 2019.10.31 |


